Integrating Zabbix Data
Compatibility
- Zabbix Server: 5.0, 6.0, 7.0
- Collector: 4.2.0.0 or later, with the Guanyun Collector module enabled
Confirming the Collector Deployment Location
Collector needs to read Zabbix Server export files and retrieve data from the Zabbix API.
Therefore, we recommend deploying Collector on the same host as Zabbix Server. If Zabbix Server stores its export files on shared storage (for example, an NFS mount), you can deploy Collector on any host that can access the shared storage. This host also needs to be able to reach the Zabbix API over the network.
Firewall Policy (Optional)
The following IP addresses and ports are examples. Update them based on your environment before applying the network rules.
| Source Address | Target Address | Target Port | Description |
|---|---|---|---|
| Collector Host | Guanyun Platform | 80 | Installing Collector and uploading data to Guanyun Platform |
| Collector Host | Zabbix API | 80 | Reading Zabbix API data |
Installing Collector
-
Log in to Guanyun Platform.
-
In the left navigation bar, click All Apps, then click Deployment Status in the lite app list.
-
On the deployment status page, click the Collectors Operation tab at the top of the page.
-
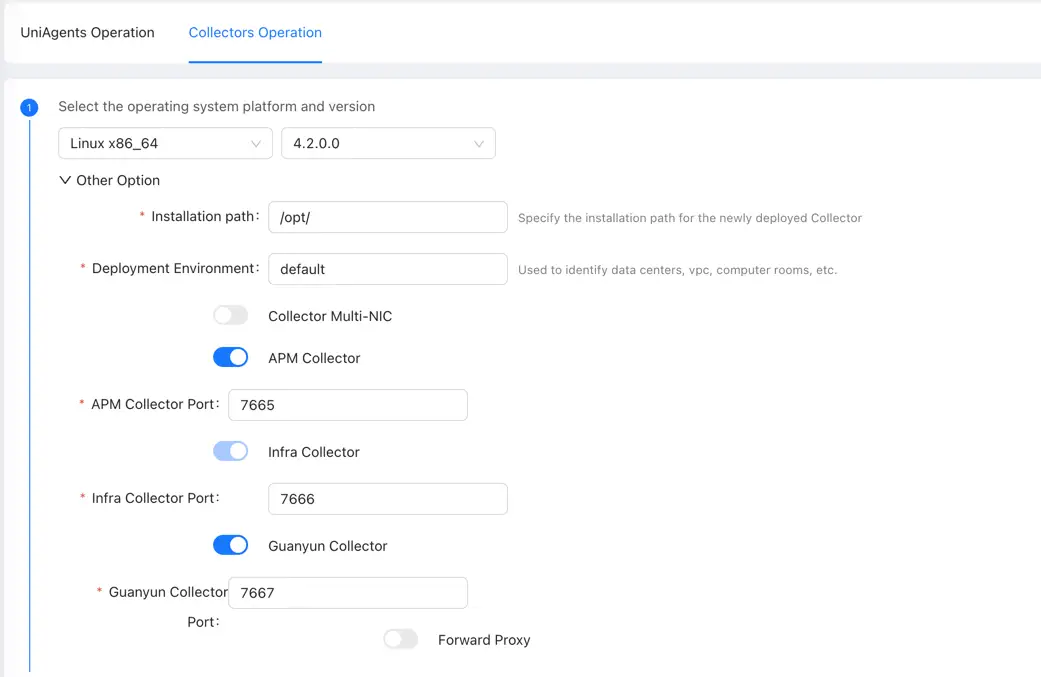
Click Create in the upper right corner and configure the Collector parameters:
- We recommend disabling APM Collector to reduce CPU overhead on the Zabbix Server host.
- You need to enable Guanyun Collector to ingest monitoring data from Zabbix.
-
Copy the Collector installation script and run it on the Zabbix Server host to complete the installation.
Configuring Zabbix Server Export Files
-
Find the Zabbix Server configuration file.
Run the following command on the Zabbix Server:
ps -ef |grep zabbix_server.conf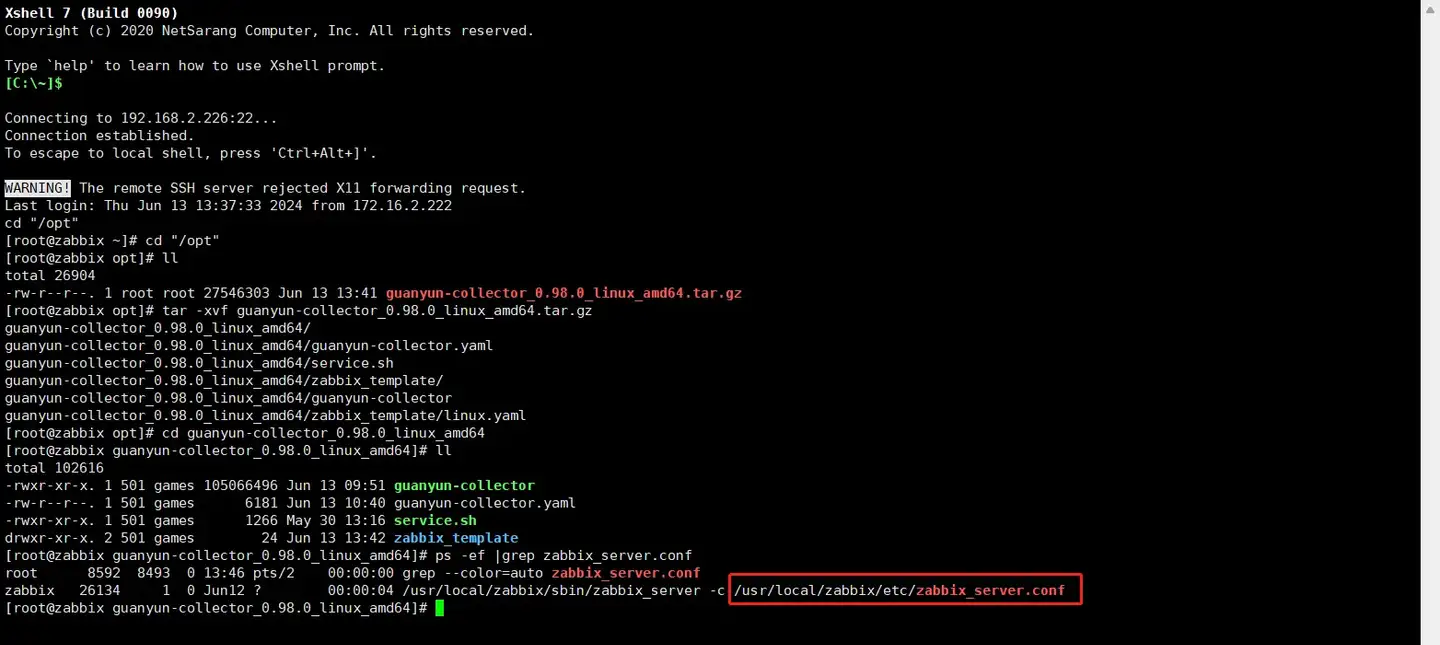
-
Modify the Zabbix Server configuration file.
Use
vimto open thezabbix_server.conffile found above, and update the configuration as follows:# ExportDir=
# Set this to the directory for exporting metric data. The user running zabbix server need to have read/write permissions for this directory.
# Note: This directory needs to be created manually in advance.
#ExportDir=/data/zabbix/data
ExportDir=
### Option: ExportFileSize
# Maximum size per export file in bytes.
# Only used for rotation if ExportDir is set.
#
# Mandatory: no
# Range: 1M-1G
# Default:
# ExportFileSize=1G (configure as needed)
ExportFileSize=1G
### Option: ExportType
# List of comma delimited types of real time export - allows to control export entities by their
# type (events, history, trends) individually.
# Valid only if ExportDir is set.
#
# Mandatory: no
# Default:
# ExportType=events,history,trends
ExportType=history -
Restart the Zabbix Server.
sudo systemctl restart zabbix-server.service
Validating Zabbix Server Export Data
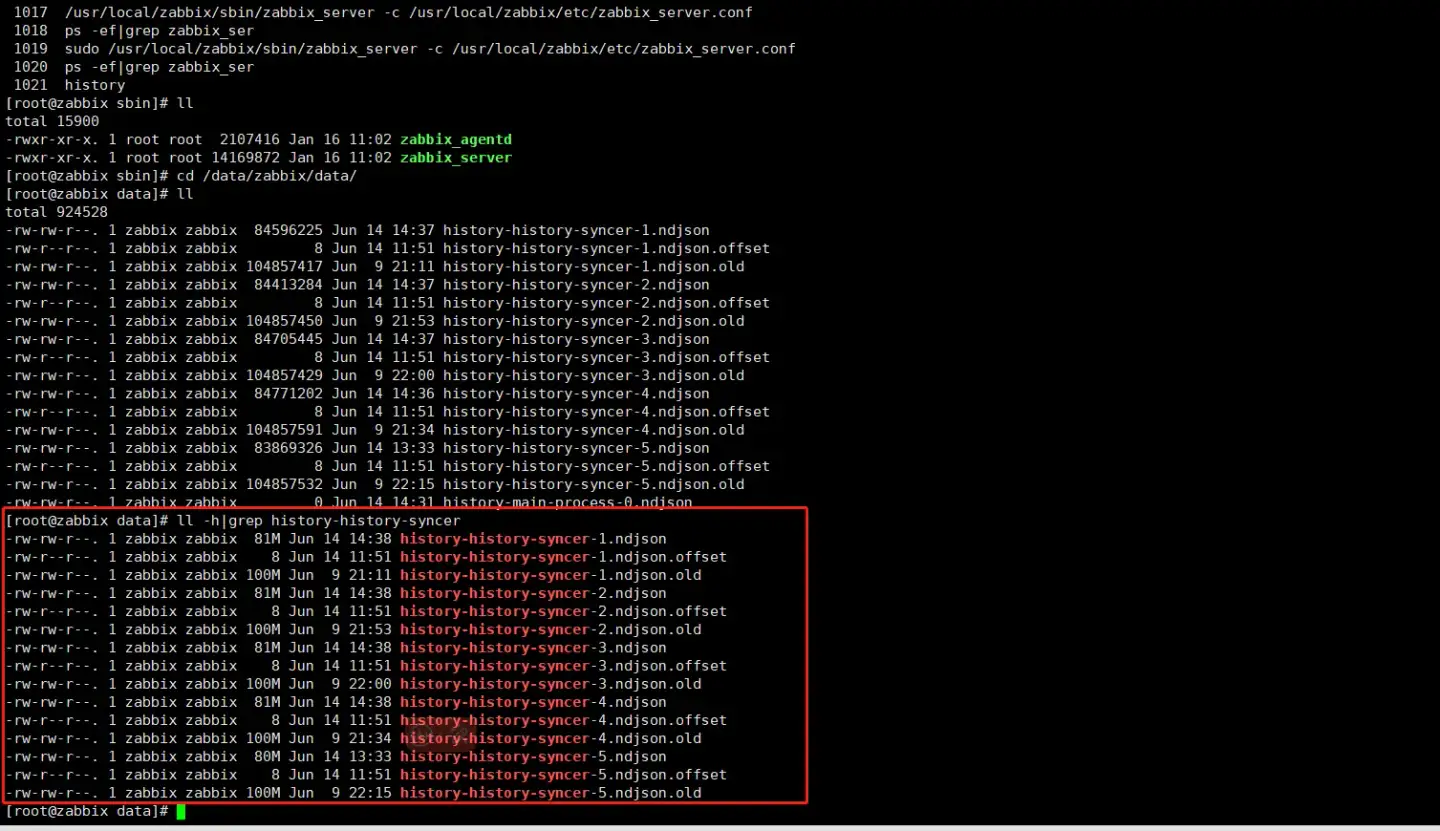
Go to the export directory for metric data: ExportDir (e.g., /data/zabbix/data)
As shown below, if files whose filenames contain history-history-syncer appear, it indicates that metric data is being generated.
Configuring Collector to Receive Zabbix Data
-
Enter the Collector installation directory.
cd /opt/tingyun-collector/ -
Enable the Zabbix module.
sudo mkdir -p /opt/tingyun-collector/zabbix/checkpoint/
cd conf.d/zabbix
sudo cp host-receiver.yaml.example host-receiver.yaml
sudo cp host-processor-exporter.yaml.example host-processor-exporter.yaml -
Edit the configuration to receive Zabbix data.
sudo vim host-receiver.yamlreceivers:
zabbix:
# Required
# Zabbix URL address
# Example: http://localhost/zabbix/api_jsonrpc.php
url:
# Required
# Zabbix dashboard login user
# Example: Admin
user:
# Required
# Zabbix dashboard login password, supports plaintext and encrypted (pass-gen) passwords
# Example: zabbix
password:
# Required
# Zabbix version. Supported versions: 5.0, 6.0, 7.0. Default: 5.0
# Type: float
version: 5.0
export:
# Required
# Directory for Zabbix metric export, need to have read/write permissions
# Example: /data/zabbix/data
directory:
# Required
checkpoint: ${env:TINGYUN_COLLECTOR_HOME}/zabbix/checkpointTo generate
password, use the following command:/opt/tingyun-collector/bin/watchdog -mode passgen -plaintext 'your_plaintext_password'.
Restarting Collector
After updating the configuration, restart Collector:
sudo systemctl restart tingyun-collector
Validating Data
tail -f /opt/tingyun-collector/logs/guanyun/collector.log
Viewing Data in Guanyun Platform
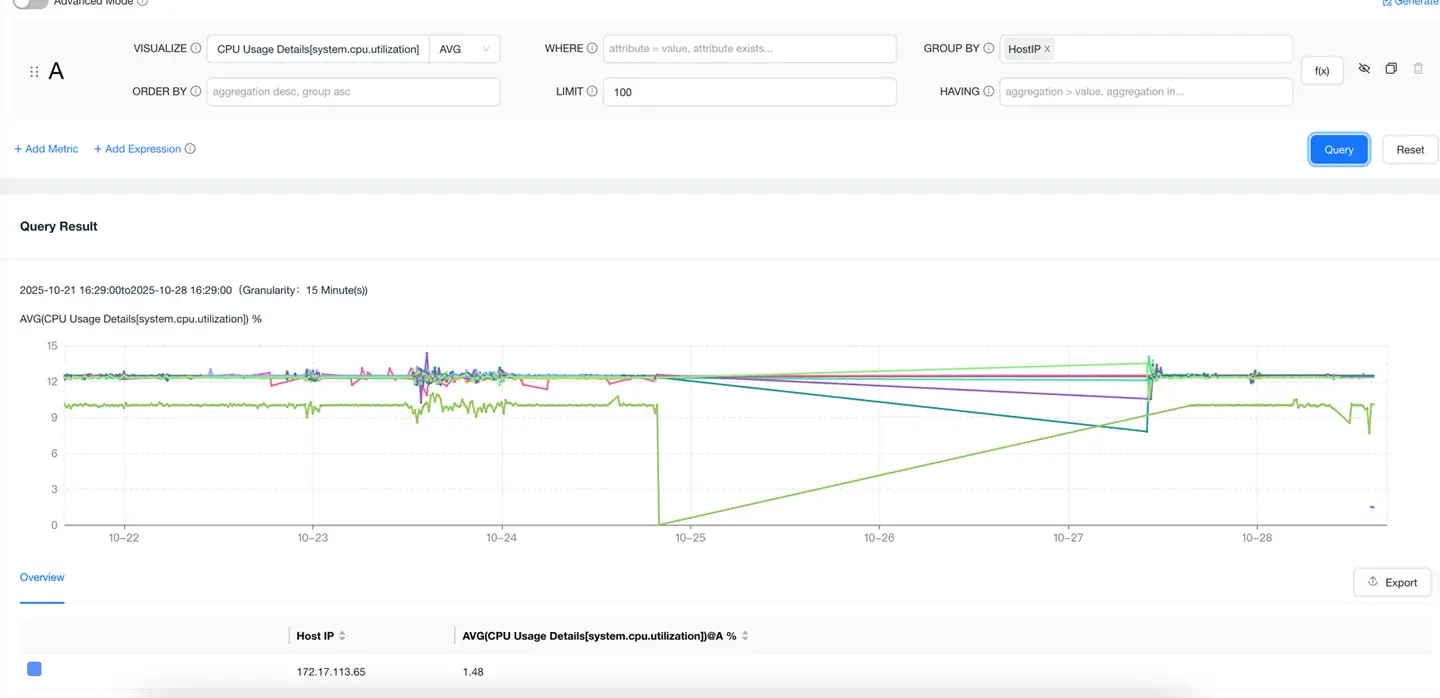
Go to the Data Explorer lite app, select METRIC as the data model, query any host metric, group by host IP, and confirm that the host IP of the integrated Zabbix data appears in the list.