接入Zabbix数据
适配范围
- Zabbix Server:5.0、6.0、7.0。
- Collector:4.2.0.0及以上,并启用Guanyun Collector模块。
确认Collector部署位置
Collector需要读取Zabbix Server文件以及Zabbix API数据。因此,建议将Collector部署在Zabbix Server所在服务器上。
如果Zabbix Server将其文件存储于网络共享存储(如通过NFS挂载的存储),则Collector可部署于任何能访问此存储的服务器上。同时,该服务器必须能够通过网络访问Zabbix API。
配置防火墙策略
下表为示例地址与端口。请结合实际项目的地址规划和端口配置进行调整后再实施。
| 源地址 | 目标地址 | 目标端口 | 说明 |
|---|---|---|---|
| Collector所在服务器 | 观云平台 | 80 | Collector安装,向观云平台上传数据 |
| Collector所在服务器 | Zabbix API | 80 | 读取Zabbix API数据 |
安装Collector
-
登录观云平台。
-
在左侧导航栏点击全部应用,在打开的轻应用列表中点击部署状态。
-
在部署状态页面上方点击Collectors管理页签。
-
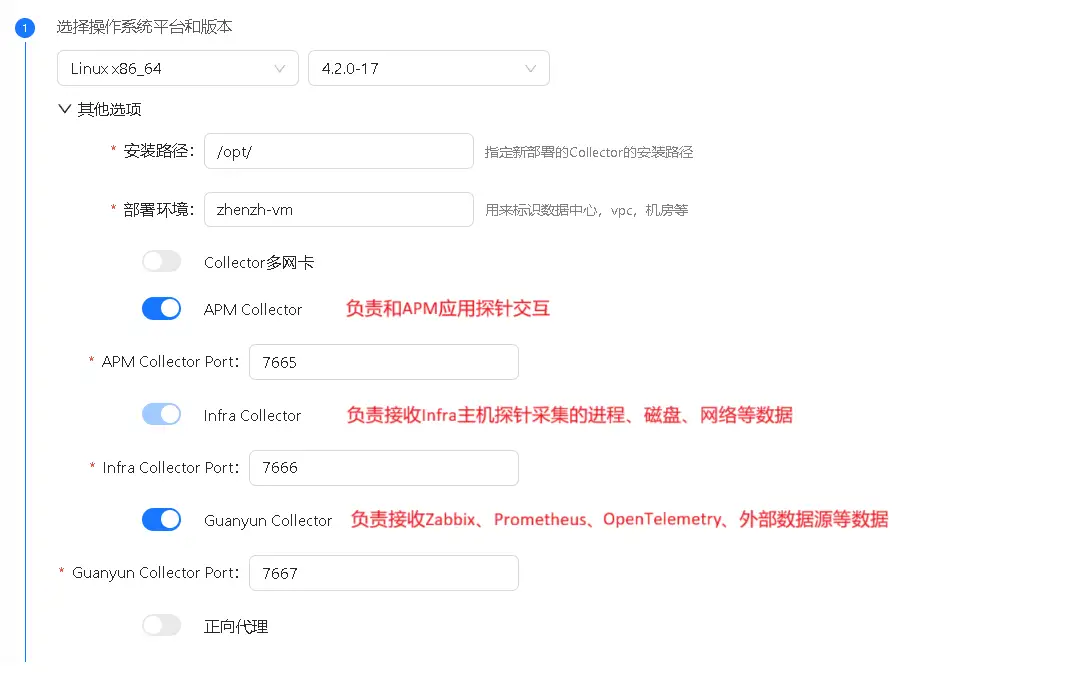
点击列表右上角的新增按钮,在打开页面中配置Collector参数:
- 推荐关闭APM Collector:APM功能会消耗较高CPU资源,建议尽量减少对Zabbix Server的影响。
- 必须开启Guanyun Collector:用于接收Zabbix监控数据。
-
复制Collector安装脚本,在Zabbix Server所在的服务器上执行脚本完成安装。
配置Zabbix Server导出文件
-
查找Zabbix Server配置文件。
在Zabbix Server服务器上执行以下命令:
ps -ef |grep zabbix_server.conf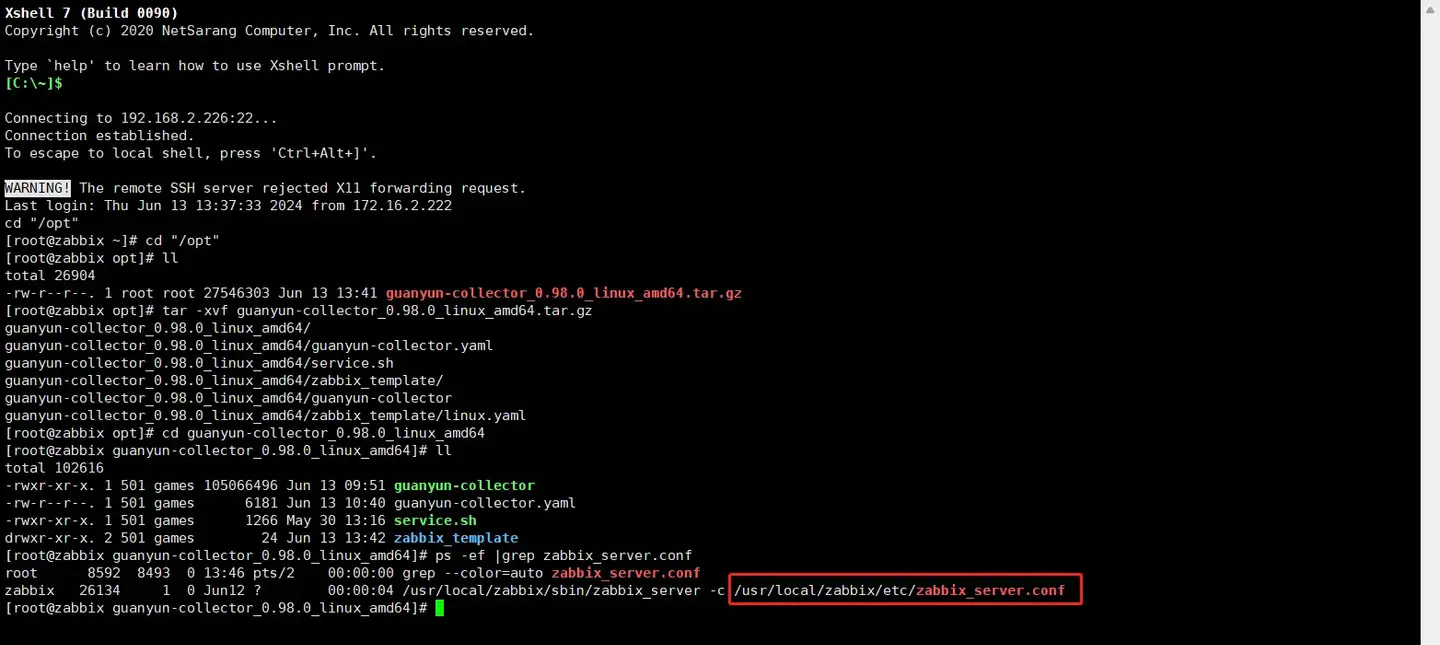
-
修改Zabbix Server配置文件。
使用
vim命令打开通过ps查到的zabbix_server.conf文件,并对照下方配置修改:# ExportDir=
# 这里修改为指标数据导出的目录,需要运行Zabbix Server的用户具有这个目录读写权限
# 注意该目录需要提前手工创建
#ExportDir=/data/zabbix/data
ExportDir=
### Option: ExportFileSize
# Maximum size per export file in bytes.
# Only used for rotation if ExportDir is set.
#
# Mandatory: no
# Range: 1M-1G
# Default:
# ExportFileSize=1G 根据实际情况配置
ExportFileSize=1G
### Option: ExportType
# List of comma delimited types of real time export - allows to control export entities by their
# type (events, history, trends) individually.
# Valid only if ExportDir is set.
#
# Mandatory: no
# Default:
# ExportType=events,history,trends
ExportType=history -
重启Zabbix Server。
sudo systemctl restart zabbix-server.service
验证Zabbix Server导出数据
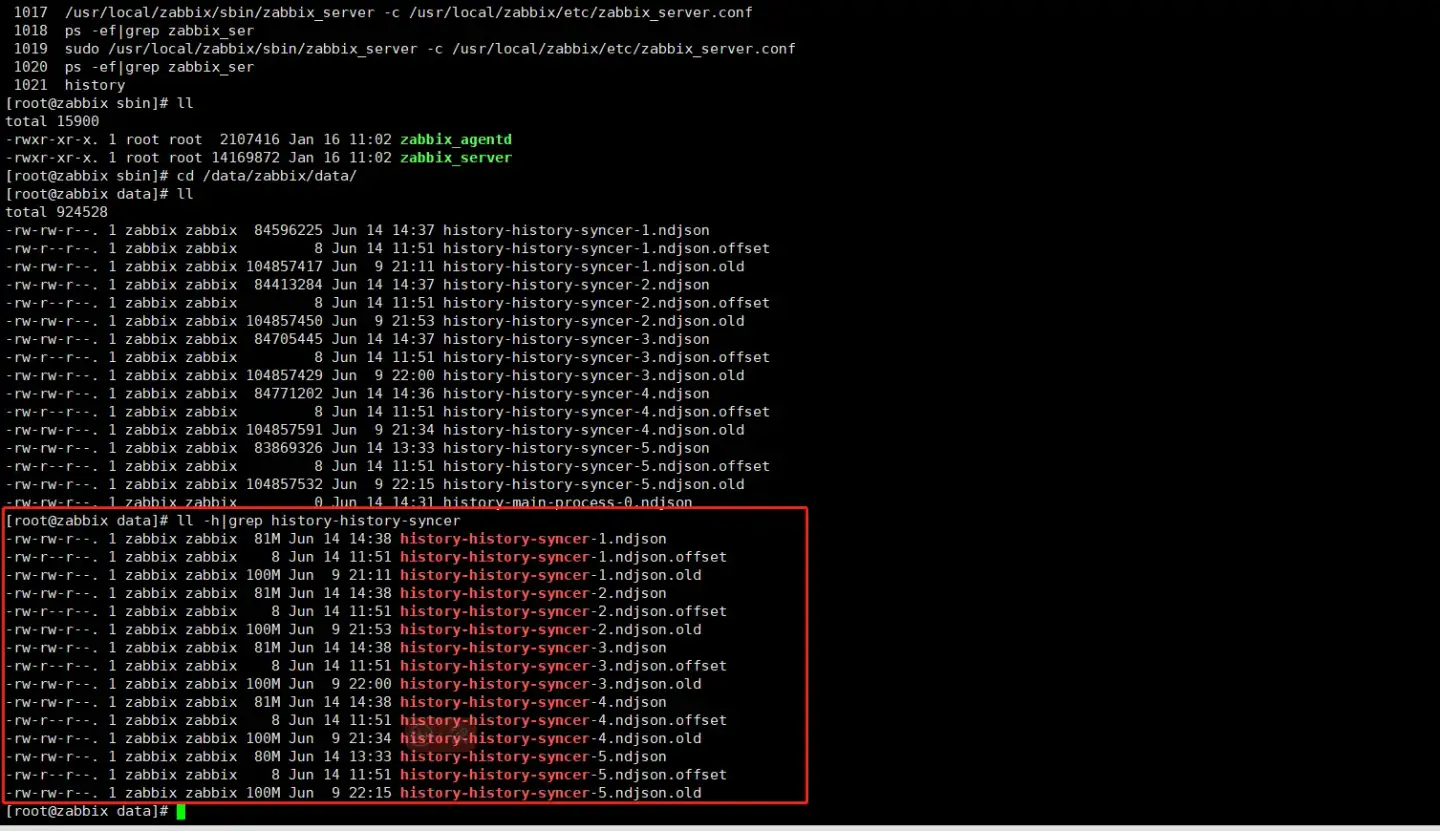
进入指标数据导出的目录:ExportDir(/data/zabbix/data)。
如下图所示,若目录中出现文件名包含history-history-syncer的文件,则表示有指标数据产生。
配置Collector接收Zabbix数据
-
进入Collector安装目录。
cd /opt/tingyun-collector/ -
开启Zabbix模块。
sudo mkdir -p /opt/tingyun-collector/zabbix/checkpoint/
cd conf.d/zabbix
sudo cp host-receiver.yaml.example host-receiver.yaml
sudo cp host-processor-exporter.yaml.example host-processor-exporter.yaml -
修改接收Zabbix数据配置:
sudo vim host-receiver.yamlreceivers:
zabbix:
# 必填
# zabbix url地址
# 示例: http://localhost/zabbix/api_jsonrpc.php
url:
# 可选,默认 false 用于跳过ssl证书验证
#skip_verify_ssl: false
# 必填
# zabbix 报表登陆用户
# 示例: Admin
user:
# 必填
# zabbix 报表登陆密码,支持明文和密文(pass-gen)生成
# 示例: zabbix
password:
# 必填
# zabbix 版本,目前支持 5.0、6.0、7.0 默认 5.0
# float类型
version: 5.0
export:
# 必填
# zabbix 指标导出的目录,需要有可读可写权限
# 示例: /data/zabbix/data
directory:
# 必填
checkpoint: ${env:TINGYUN_COLLECTOR_HOME}/zabbix/checkpoint其中,
password使用以下命令生成/opt/tingyun-collector/bin/watchdog -mode passgen -plaintext '明文密码'。
重启Collector
配置修改完成后,需要重启Collector:
sudo systemctl restart tingyun-collector
验证数据
tail -f /opt/tingyun-collector/logs/guanyun/collector.log
查看报表
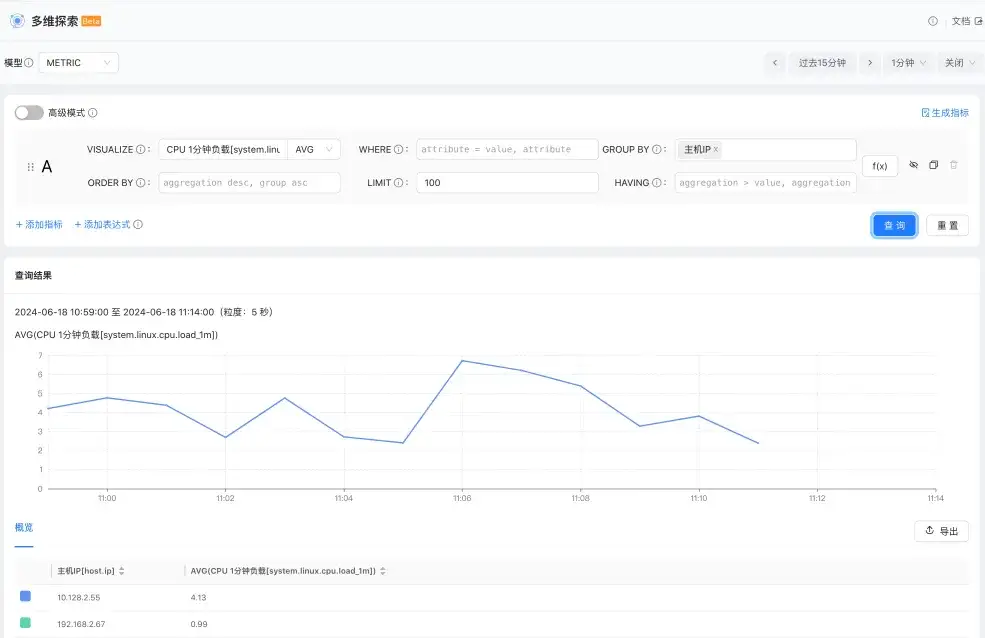
进入观云平台多维探索轻应用,选择模型为METRIC,查询任意主机指标并按主机IP分组,确认列表中存在已接入的Zabbix主机IP。