Application Settings
Basic Settings
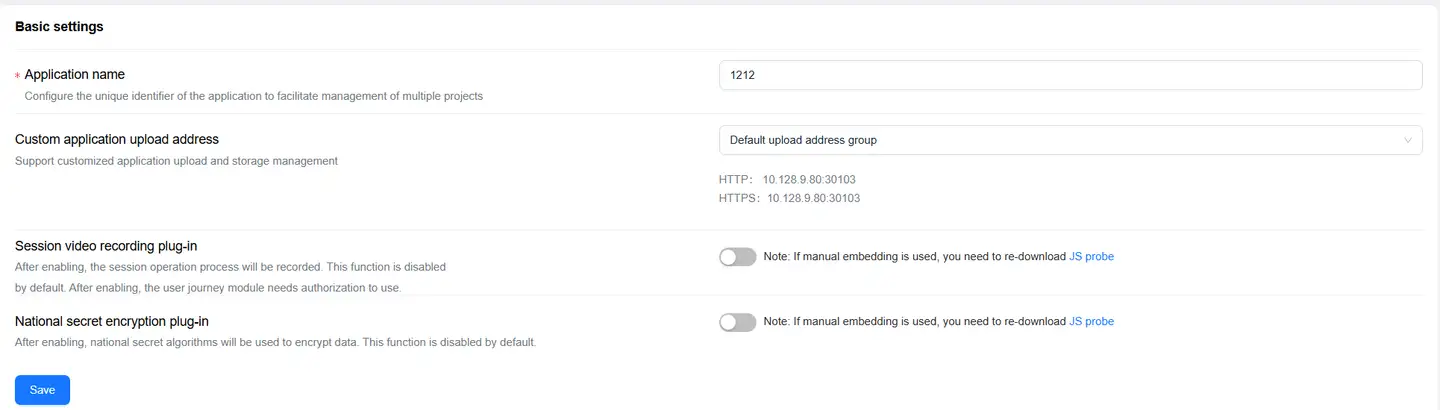
Basic settings are mainly used to set the application name, upload address custom application upload address, session video recording plugin, and SM2 encryption plugin.
Get Agent

Click Original Agent on the right side of the page to download the JS agent without configuration to your local machine. Click the Copy JS button to quickly copy the browser agent content to the clipboard.
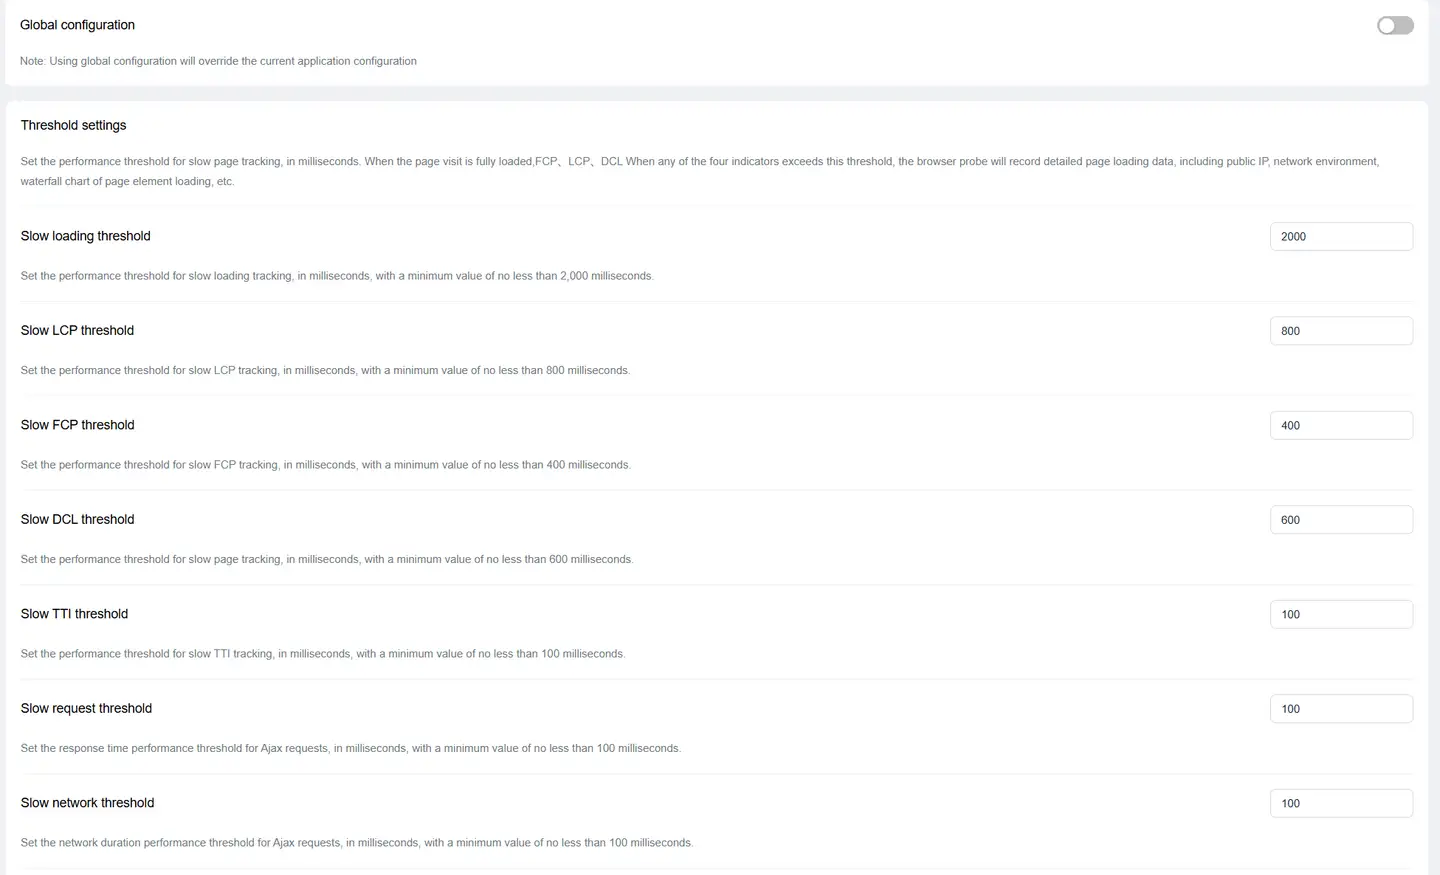
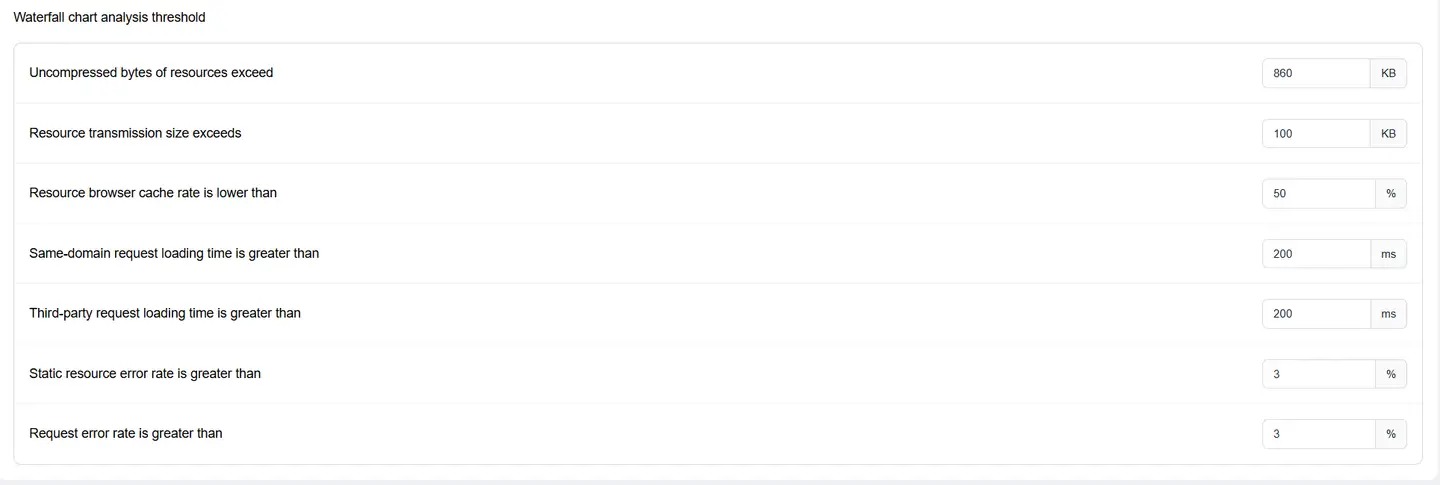
Threshold Settings
Set the performance threshold for slow page tracking, in milliseconds. When any of the four metrics of page access full load, FCP, LCP, and DCL exceeds this threshold, the browser agent will record detailed page loading data, including public IP, network environment, page element loading waterfall chart, and other information.
Request Content Collection
After enabling this switch, the agent will collect the Header and Body parameters of Http/Https requests.
It should be noted that the Body only collects content with response body types of "text and json" data structures, and by default does not collect request headers that are known to involve confidentiality, such as: Authorization, Cookie, and Proxy-Authorization.

Custom Dimensions

Configure custom information to upload custom dimensions, then set dimension whitelist, and you can filter through custom dimensions in the tracking list.
Note: Using general configuration will override the current application configuration.
Trace Tracking
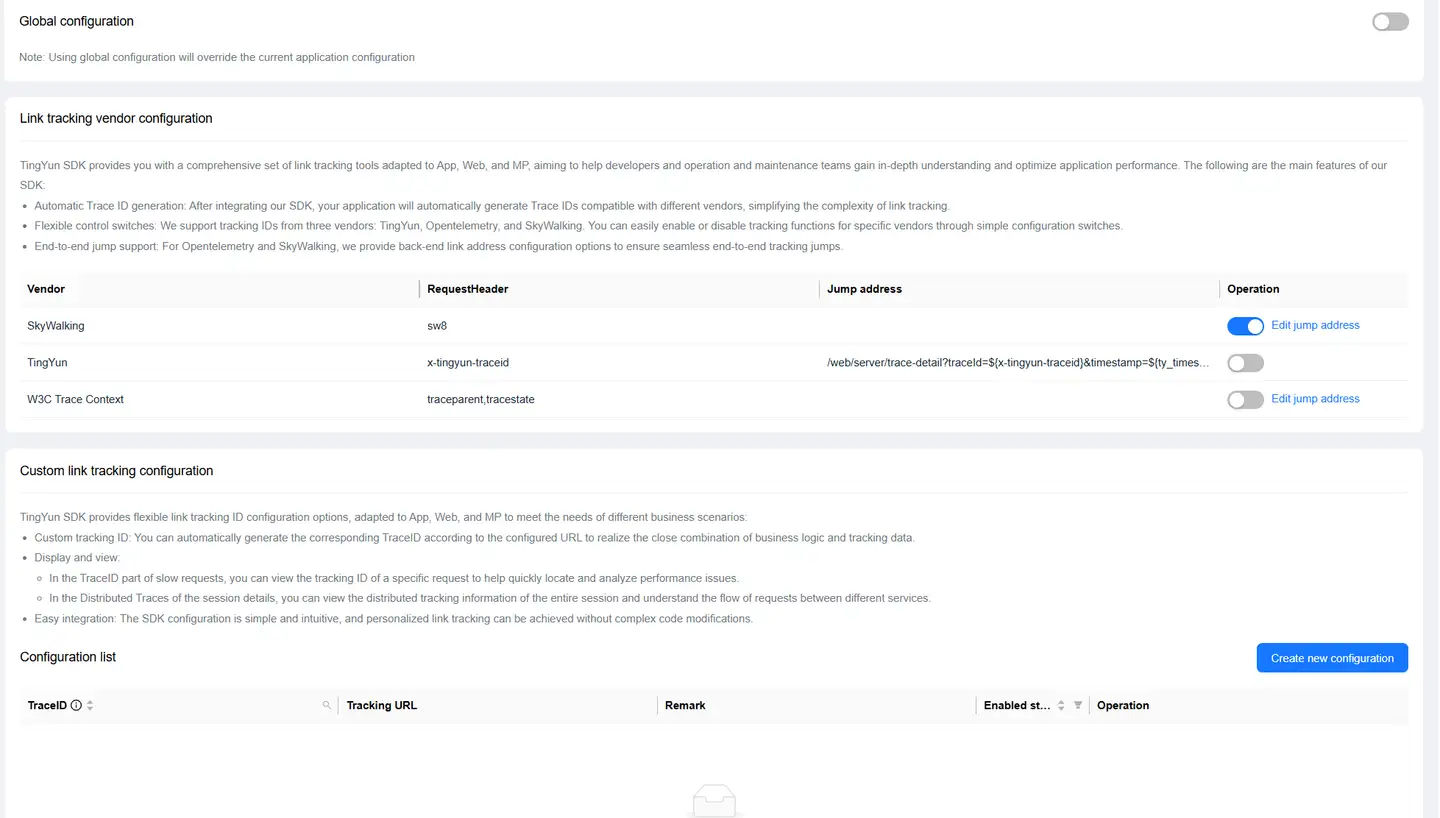
Due to the same-origin policy restrictions of browsers, cross-domain requests cannot perform cross-application call chain tracking with backend transactions. To solve this problem, special markers (X-Tingyun) need to be added to cross-domain requests for verification.
Note: If cross-domain cross-application tracking is enabled, cross-domain configuration must be added, otherwise business requests will fail.
To configure cross-domain call chain tracking, follow these steps.
-
Turn on the APM Association switch.
-
Click the New Configuration button in the Custom Request Headers section to set the APM system request headers for associating with backend transactions.
After configuration, the system will generate a UUID, and Ajax requests will carry related request headers, which can track backend transactions based on this TraceID.
- TraceID: A unique identifier in the request header that is traced to the backend, used for collecting call chain tracking data. In the request analysis details list of the Guanyun platform, you can view the performance metric data of backend requests associated through TraceID. This item is required. To configure multiple TraceIDs, separate them with English commas.
- Tracking URL: The address for jumping from the Guanyun platform to a third-party APM. For example: If the URL of your third-party tracking platform is
https://wukong.tingyun.com/web/server/trace-detail/tx/0101/010101010101?timestamp=1010101010101, you need to set the tracking URL tohttps:/wukong.tingyun.com/web/server/trace-detail/tx/${appId}/${traceId}?timestamp=${tyTimestamp}. This item is optional. - Remarks: Description of this configuration item. This item is optional.
-
Configure special markers on the server side.
-
Verify that the server-side configuration is correct.
-
Add cross-domain domain names.
-
Click the Save Settings button at the bottom of the page.
-
Verify that the cross-domain application is effective.
Note: Those using automatic embedding need to re-embed.
For specific configuration methods for steps 3 to 7, please refer to Cross-Application Cross-Domain Settings.
Data Filtering Settings
Web Page Loading Time Extreme Value Filtering
Set the threshold for abnormal data elimination, in seconds, default is 120 seconds. When not enabled, the system default filtering rule will take effect, which is to filter this page performance data when DCL or full load is greater than 10 times of FCP and any of the four metrics of FCP, LCP, DCL, and full load is greater than 60 seconds. When enabled, the filtering rule is to filter this page performance data when any of the four metrics of FCP, LCP, DCL, and full load is greater than the set value, and the system default filtering rule will be turned off. Page performance data that meets the filtering rules will be eliminated and will not participate in page performance metric calculations, but JS errors that occur on the page will still be retained and participate in JS error rate calculations.

Domain Whitelist
Set domain whitelist to filter out interference data outside the whitelist. To add a domain whitelist, simply enter the complete domain name.

Filter Robot Data
When enabled, it will filter out access data containing the keywords "Bot", "Spider", "Crawler", "Yahoo! Slurp", "NetworkBench" in the UA.

Country Region Whitelist
By default, it is not enabled, meaning all country region data is collected, and data from all countries and regions are calculated into the overall application performance. After enabling, check one or more countries, and only data from the checked countries and regions will be collected, and the overall application performance will only use data from the checked countries and regions for calculation.

JS Error Filtering
Tingyun Web supports filtering JS errors by error file keywords, error message keywords, and UA keywords. Keywords are separated by line breaks. After setting, JS errors that meet the filtering rules will no longer be counted in the JS error rate, and the corresponding JS error rate alarms will no longer be triggered.

User Experience Score Settings
The user experience score uses FCP, LCP, DCL, slow page percentage, operation time, and operation availability, 6 metric dimensions to comprehensively score the loading speed of web pages opened by users, the response speed of click operations, and the availability of operations. Users can customize the thresholds of the 6 metrics to establish a scoring standard for website user experience.
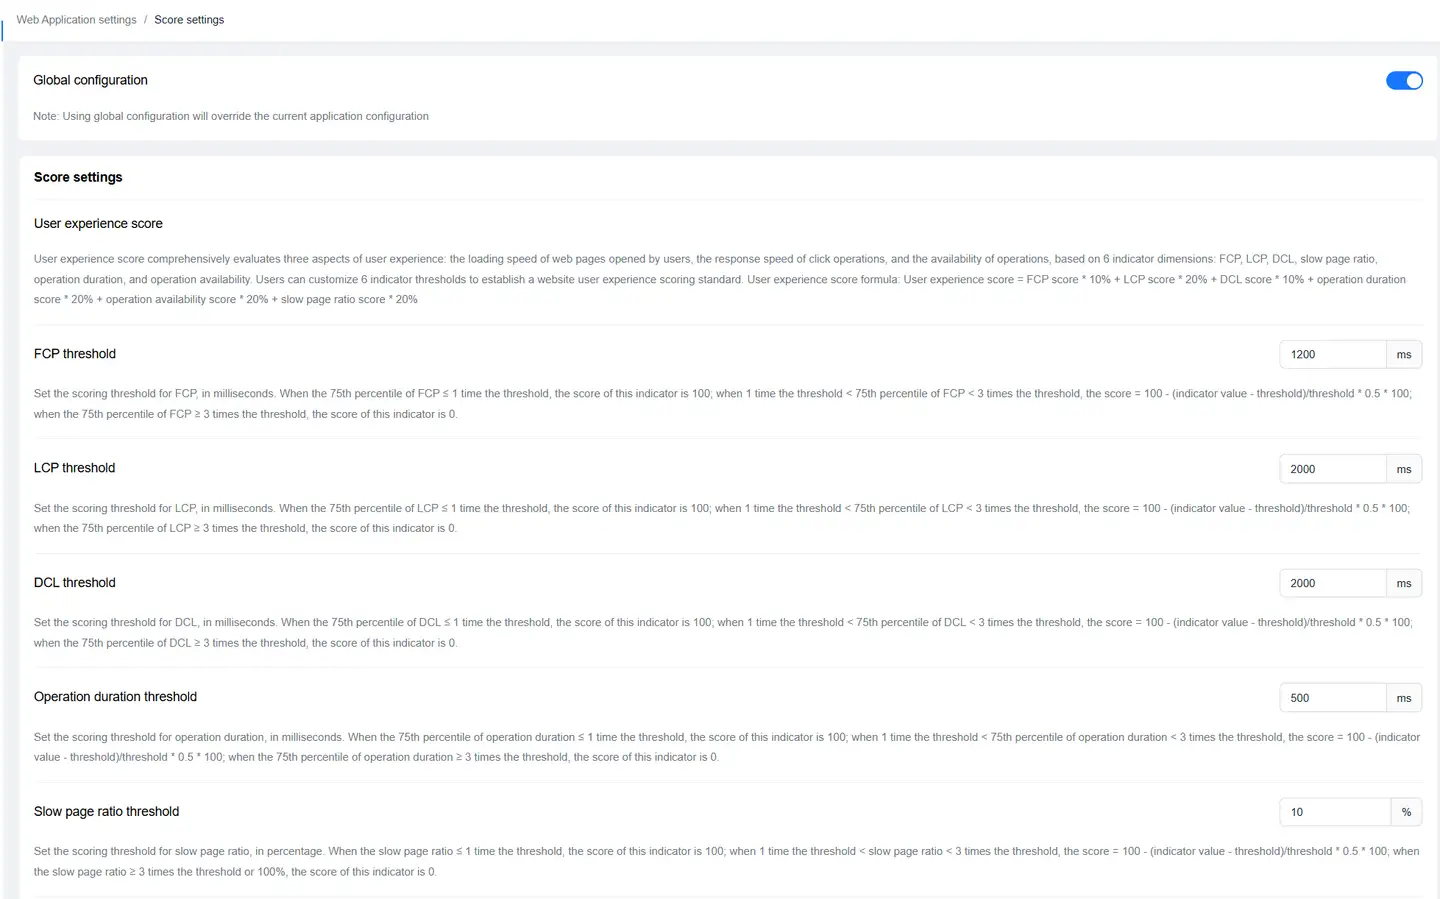
User experience score formula: User experience score = FCP score * 10% + LCP score * 20% + DCL score * 10% + Operation time score * 20% + Operation availability score * 20% + Slow page percentage score * 20%.
Source Map
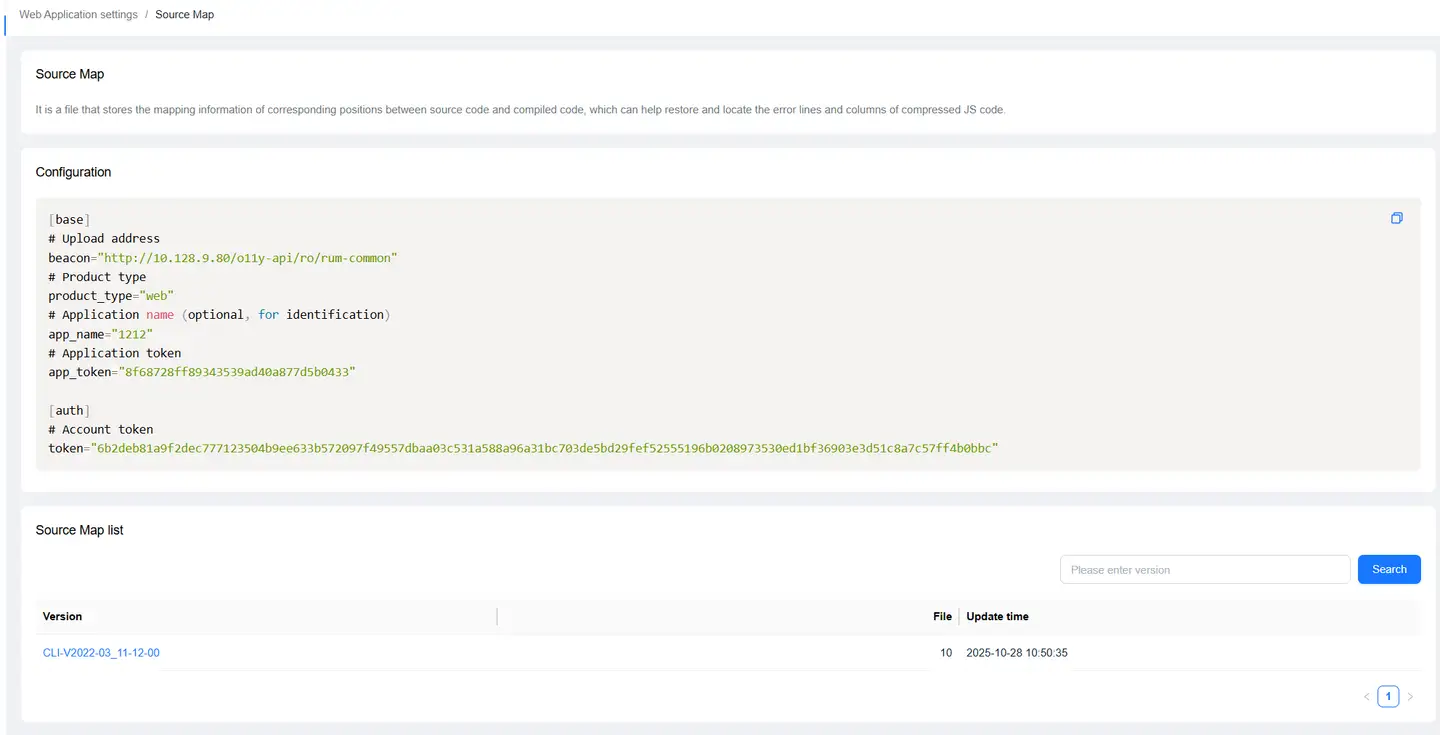
Source Map is an information file that stores the mapping of positions between source code and compiled code, making it easier for developers to locate the above code errors. Tingyun provides Source Map upload to restore the true error location of the code, restoring the JS error scene. This allows developers to quickly locate the source code position of the error and the corresponding code block.
Source Map upload supports two methods: CLI and Webpack plugin. For specific instructions, please refer to Source Map.
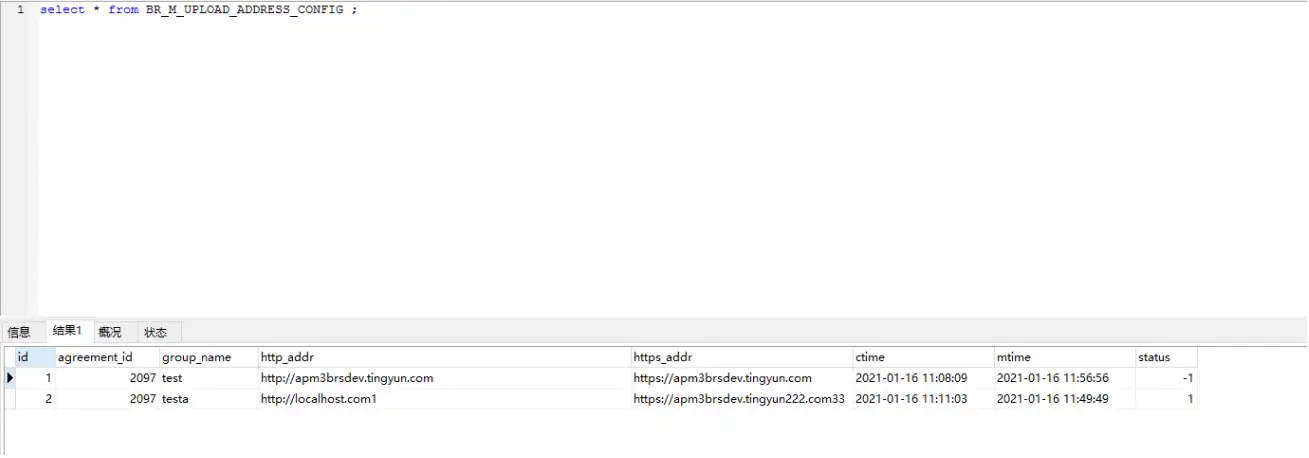
Custom Application Upload Address
Applications can upload data based on the configured upload address, distinguishing between intranet applications and internet applications. The upload address configuration method is as follows:
-
Enter MySQL and configure the upload address in BR_M_UPLOAD_ADDRESS_CONFIG. -- Upload address configuration table CREATE TABLE IF NOT EXISTS BR_M_UPLOAD_ADDRESS_CONFIG ( id int(10) unsigned NOT NULL AUTO_INCREMENT COMMENT 'ID', agreement_id int(10) unsigned DEFAULT NULL COMMENT 'Contract number', group_name varchar(256) CHARACTER SET utf8 COLLATE utf8_bin NOT NULL COMMENT 'Group name', http_addr varchar(256) CHARACTER SET utf8 COLLATE utf8_bin NOT NULL COMMENT 'http address', https_addr varchar(256) CHARACTER SET utf8 COLLATE utf8_bin NOT NULL COMMENT 'https address', ctime datetime NOT NULL COMMENT 'Creation time', mtime datetime NOT NULL COMMENT 'Modification time', status tinyint(4) NOT NULL DEFAULT '1' COMMENT 'Status 1 - Enabled -1 - Deleted', PRIMARY KEY ( id ) ) ENGINE=InnoDB AUTO_INCREMENT=1 DEFAULT CHARSET=utf8 COLLATE=utf8_bin COMMENT='Upload address configuration table';
-
Add upload address field to the application table.
call add_tab_column('venus_conf', 'BR_U_APPLICATION', 'upload_addr_id', 'int', 10, 'unsigned', '0', 'mobile_app_id');
- View the address in the Application Upload Address dropdown menu on the page.