Private Image Repository Deployment
Upload Deployment Package on Private Platform
-
Contact technical support to obtain the Agent deployment package tingyun-kubeimage-X.X.X.X.zip, where X.X.X.X is the Agent version number.
-
Upload the deployment package using the admin account, then you can see the updated Kubernetes UniAgent on the Download Center page.
Upload to Private Image Repository
-
Contact technical support to obtain the image package tingyun-k8s-images-X.X.X.X.tar.gz, where X.X.X.X is the Agent version number.
-
Extract the package.
tar xvf tingyun-k8s-images-X.X.X.X.tar.gz -
Push the images to the private repository.
To specify the image architecture as AMD64 (only applicable if all Nodes in the cluster are AMD64):
IMAGE_PLATFORM=amd64 sh ./pushImages.shTo specify the image architecture as ARM64 (only applicable if all Nodes in the cluster are ARM64):
IMAGE_PLATFORM=arm64 sh ./pushImages.shIf the cluster contains both AMD64 and ARM64 Nodes (or all Nodes are of the same CPU architecture):
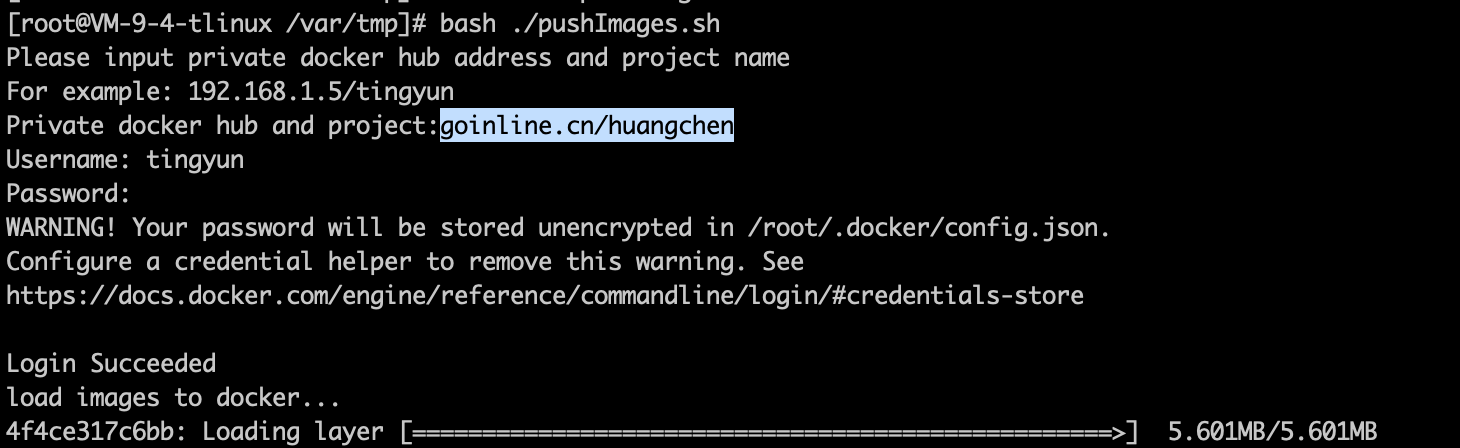
sh ./pushImages.sh-
Enter the private repository image address and project name, such as registry.tingyun.com/tingyun.
-
Enter the username and password for the private repository to log in.
-
The script will automatically detect whether docker, podman, nerdctl, ctr, etc. are installed in the current environment, and will automatically select one of the push tools.
-
The push process uses https protocol by default. If the image repository uses http protocol or you encounter x509 certificate errors (using self-signed certificates) during the push, try the command:
INSECURE=true sh ./pushImages.sh -
If the push tool used supports the Manifest function, the script will automatically upload both AMD64 and ARM64 images. When each Node pulls the image, it will try to automatically pull the image that matches the Node CPU architecture.
-
If the push tool used does not support the Manifest function, the script will prompt you to select the image type to upload, AMD64 or ARM64, and only one type of image can be pushed at a time.
Note:
- If Manifest is not enabled, AMD64 and ARM64 images will not coexist. If you push multiple times, the later image will overwrite the previous one.
- Pushing without enabling Manifest is only applicable when all Nodes have the same CPU architecture. If there are both AMD64 and ARM64 Nodes, please enable the Manifest function. See the FAQ section below for how to enable Manifest.
-
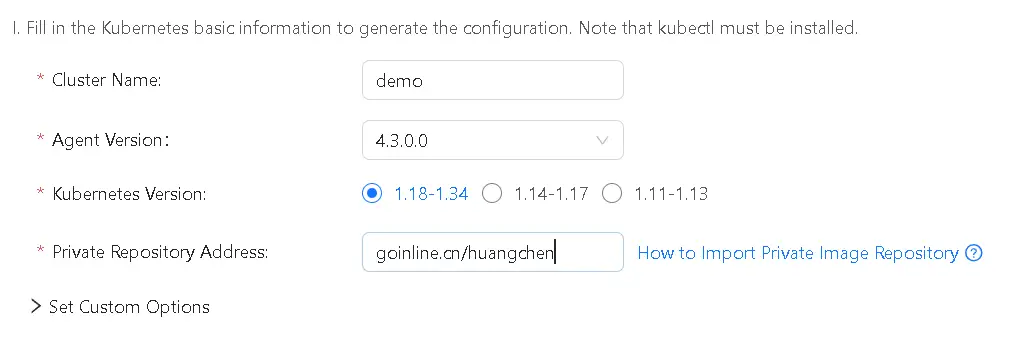
Private Image Selection
After uploading, select the private repository when deploying Kubernetes UniAgent, and enter the private repository address.
If Image Pull Requires Authentication, Set Image Pull Secret (Supported in Agent version 2.5.3.0 and above)
Create a long-term valid account in the private repository
⚠️ When creating an account, be sure to create a long-term valid account. If it is only a temporary account, the image pull will fail after the account expires.
-
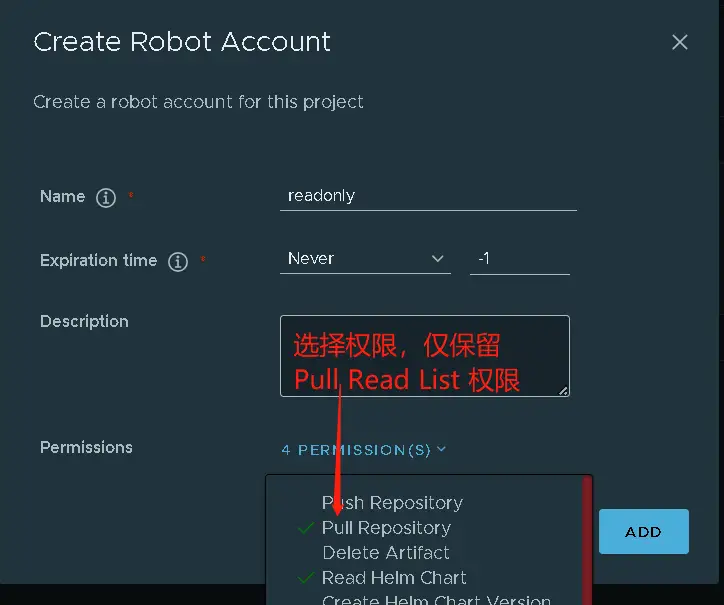
For Harbor platform, select the project where the Tingyun image is located
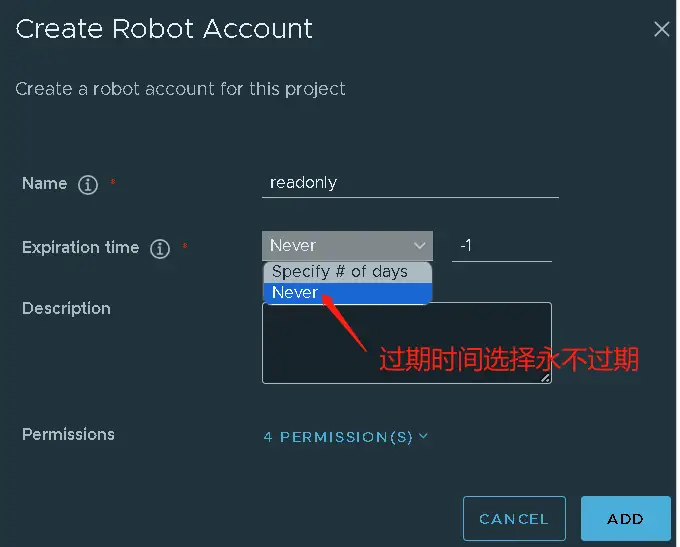
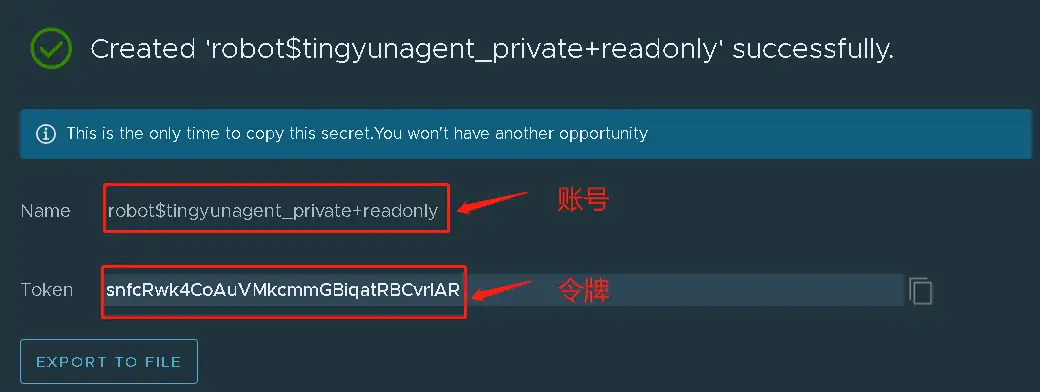
Project -> Robot Accounts, create a robot read-only account, select never expire for expiration time, select query and pull image permissions, and generate the account and token: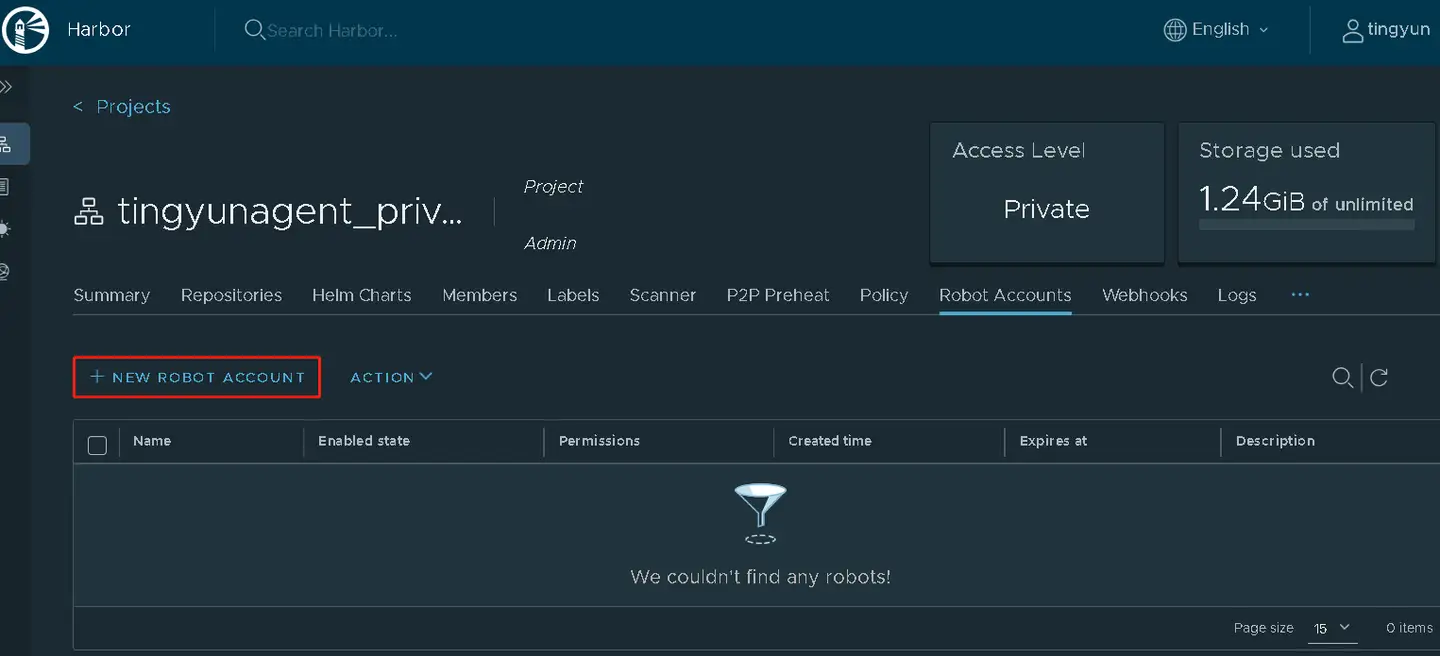

Add Image Pull Secret to the Namespace where the Tingyun Agent is located
In the namespace where the Tingyun Agent is located (e.g., tingyun), create a secret named tingyun-image-secret.
Make sure to enter the correct secret type, private repository server address, account, and password or token.
kubectl -n tingyun create secret docker-registry tingyun-image-secret \
--docker-server=[private repository domain] --docker-username=[account] --docker-password=[password or token]
⚠️ If the account name or password/token contains special characters like $+, When executing the command, you need to escape it or enclose it in single quotes.
For example, if the username is robot$test+app-readonly, it should be entered as:
kubectl -n tingyun create secret docker-registry tingyun-image-secret \
--docker-server='test.huaweicloud.com' --docker-username='robot$test+app-readonly' --docker-password='******'
Uncomment the following two lines under kind: ServiceAccount in the yaml script downloaded from the Tingyun platform:
apiVersion: v1
kind: ServiceAccount
metadata:
  name: tingyun-k8s-monitor
  namespace: tingyun
#imagePullSecrets:
#  - name: tingyun-image-secret
After modification, the yaml should be properly formatted and aligned, with imagePullSecrets aligned with metadata, and - indented two spaces:
apiVersion: v1
kind: ServiceAccount
metadata:
  name: tingyun-k8s-monitor
  namespace: tingyun
imagePullSecrets:
  - name: tingyun-image-secret
Add Image Pull Secret to the Namespace of the Business Pod (Optional)
If the Pod to be injected already has a secret strategy that includes the permissions for the Tingyun image project, you can skip this step.
In the business namespace where the Pod to be injected is located, create a secret named tingyun-image-secret.
If multiple namespaces need to inject the Agent, you must create tingyun-image-secret in each namespace.
kubectl -n [business namespace] create secret docker-registry tingyun-image-secret \
--docker-server=[private repository domain] --docker-username=[account] --docker-password=[password or token]
Uncomment the following two lines under mutate.yaml in the yaml script downloaded from the Tingyun platform:
  mutate.yaml: |
    #imagePullSecrets:
    #- name: tingyun-image-secret
    initContainers:
After modification, the yaml should be properly formatted and aligned, with imagePullSecrets aligned with initContainers, and - aligned with imagePullSecrets:
  mutate.yaml: |
    imagePullSecrets:
    - name: tingyun-image-secret
    initContainers:
Reapply the yaml script and delete the Pod tingyun-webhook-xxx. The configuration will take effect after the Pod is recreated.
kubectl apply -f tingyunagent.yaml
kubectl -n tingyun delete pod tingyun-webhook-xxx
FAQ
Q: How to enable Manifest?
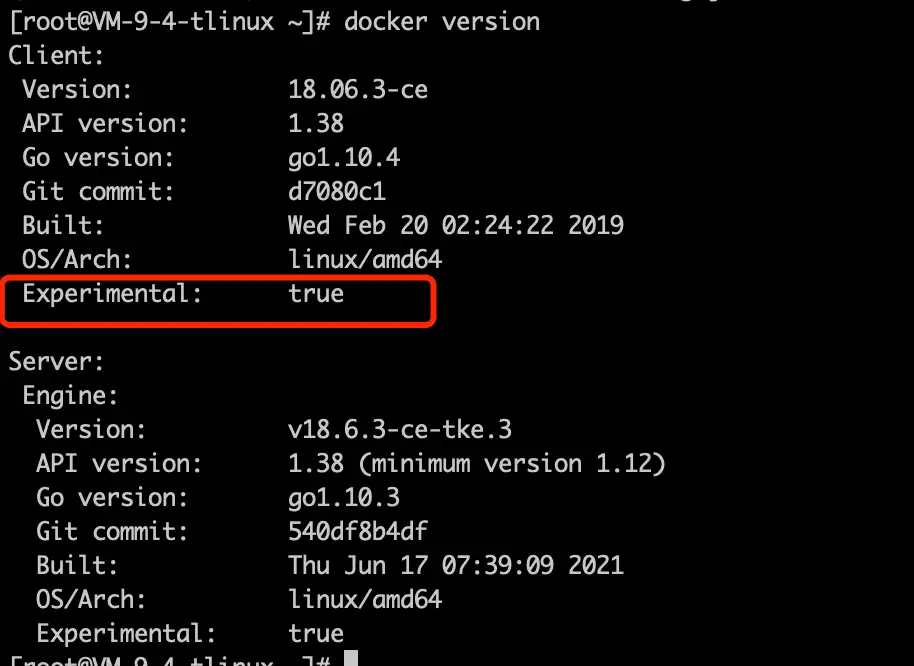
A: Docker 20 and above has enabled the Manifest function by default. For Docker versions below 20, run the following command:
-
Run
vim /root/.docker/config.jsonand set experimental to enabled:{
"auth": {},
"experimental": "enabled"
} -
Reload Docker.
systemctl daemon-reload
systemctl restart docker -
Verify if it is enabled.
Q: If both ARM64 and AMD64 images are uploaded to the same private repository, the Agent or application Pod fails to start?

A: When each Node pulls the image, it will try to automatically pull the image that matches the current Node CPU architecture.
If there are both AMD64 and ARM64 Nodes, please enable the Manifest function when pushing images. Otherwise, the Node may pull the wrong CPU architecture image, causing it to fail to start.
If the application Pod fails to start and the InitContainer reports exec /bin/sh exec format error, it means the image architecture does not match the current Node CPU architecture.
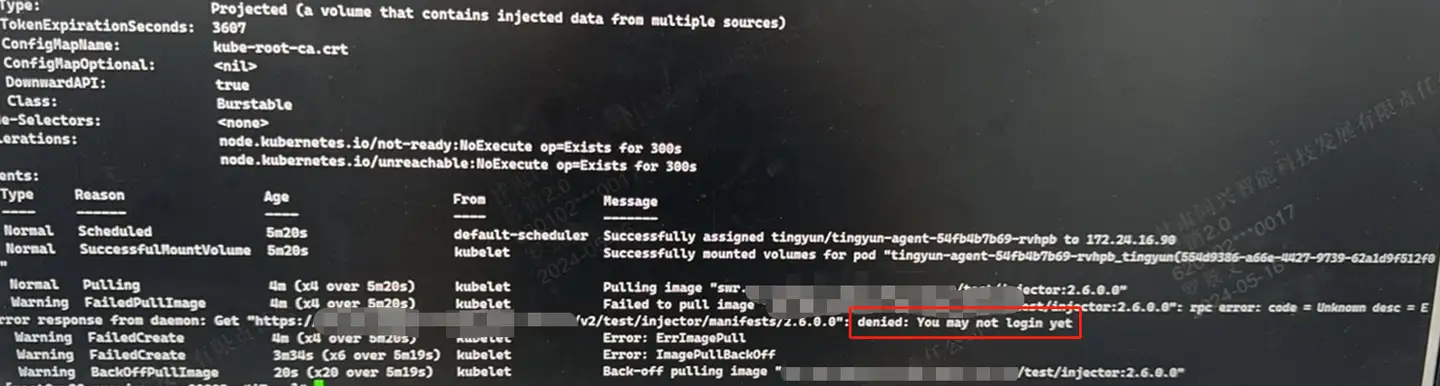
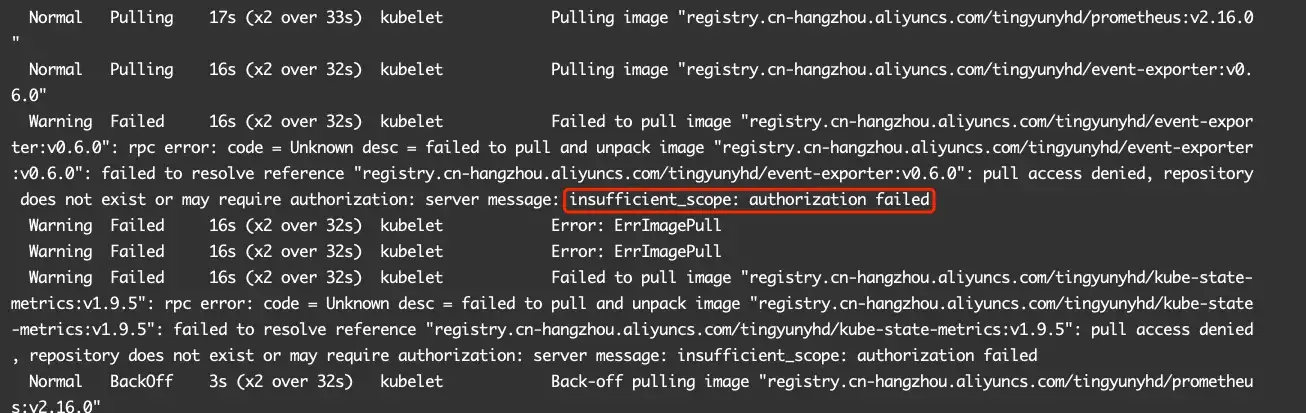
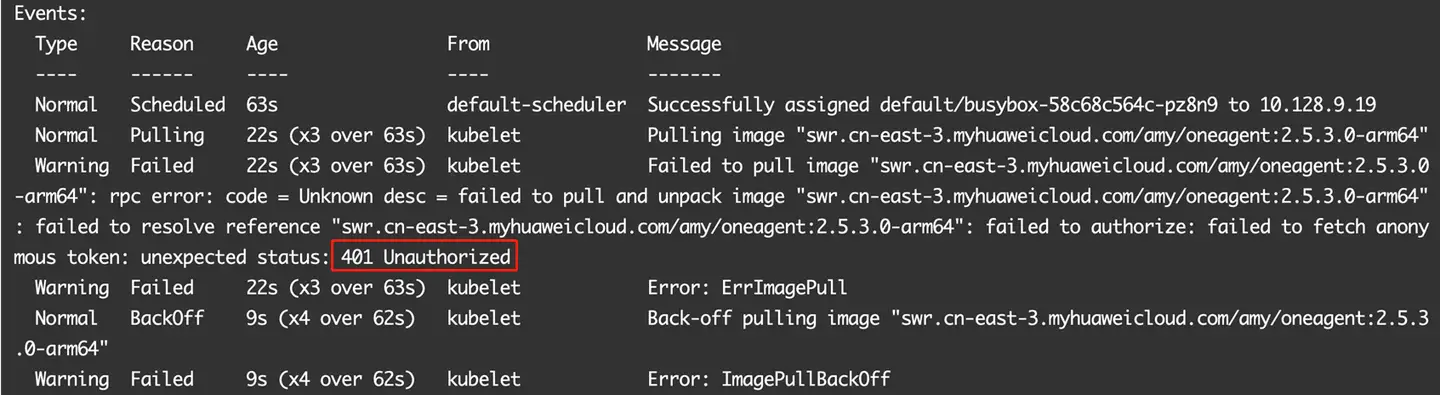
Q: During deployment, ImagePullBackOff error occurs when pulling the image
There are many reasons for ImagePullBackOff, including image not uploaded, failed to connect to the image repository, no pull permission, pull timeout, etc.
-
Failed to connect to the image repository:
connected failappears in describe pod, please contact the image repository administrator to confirm. -
No pull permission:
denied,You may not login,authorization failed,401 Unauthorizedappear in describe pod, see the documentation for how to set image pull secret.
-
Image not uploaded:
404Not Foundappear in describe pod, please contact the image repository administrator to confirm the image name and Tag are correct. -
Pull timeout:
timedtoutappears in describe pod, please contact operation and maintenance for confirmation.