Automatic Installation Guide
Prerequisites
- Before installing the Agent, please first install the Agent Collector.
- Before installing the Agent, ensure that the local browser time, server time zone, and time are all consistent. If there are multiple servers, ensure that the local browser, all server time zones, and times are consistent. Otherwise, it may affect data accuracy, such as incorrect topology, etc.
- Currently, only Tomcat, Jetty, JBoss, WildFly, and Glassfish containers support automatic installation.
Installation via Configuration File Modification
Linux or Mac Installation
-
Unzip the installation package to the root directory of your application server.
unzip tingyun-agent-java-3.4.6.zip -d /{workspace}/ -
Modify configuration items. You can configure in two ways.
Method 1: Modify the Configuration File
Edit the tingyun.properties file in the tingyun directory extracted on the server.
Modify the license_key, app_name, and collector.addresses configuration items in the file. Otherwise, the Agent cannot collect data or start. For other configuration items, configure as needed.
- license_key: Associated with your Tingyun account. Data collected by the Agent will be uploaded to the account bound to this LicenseKey. Hover the mouse over the account name in the lower left corner, select Account Management in the hover menu, and view the License Key in the Account Information tab.
- app_name: Default application name. It is recommended to configure it as the business name of the application.
- collector.addresses: The address and port of the Agent Collector server, e.g., tingyun.server.com:8080. For high-availability deployment, be sure to configure all Agent Collector server addresses and ports in the same data center, separated by commas.
Method 2: Add JVM Parameters
Configure JAVA_OPTS in catalina.sh, and add the following three parameters after
-javaagent, separated by spaces:-Dtingyun.app_name=${APP_NAME} -Dtingyun.license_key=${LICENSE_KEY} -Dtingyun.collector.addresses=${COLLECTOR_ADDRESSES}
- -Dtingyun.app_name: Application name, recommended to be the business name of the application.
- -Dtingyun.license_key: Associated with your Tingyun account. Data collected by the Agent will be uploaded to the account bound to this LicenseKey. Hover the mouse over the account name in the lower left corner, select **Account Management** in the hover menu, and view the License Key in the **Account Information** tab.
- -Dtingyun.collector.addresses: The address and port of the Agent Collector server, e.g., tingyun.server.com:8080. For high-availability deployment, be sure to configure all Agent Collector server addresses and ports in the same data center, separated by commas. -
Run the automatic installation program in the tingyun directory.
cd /{workspace}/tingyun
java -jar tingyun-agent-java.jar install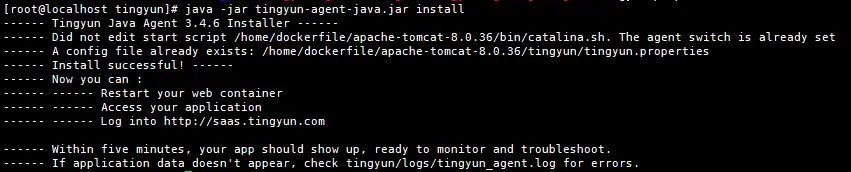
-
Start or restart the application server.
-
Log in to the Application & Microservice Console to view performance data.
When your Java application service has HTTP requests, performance data will be sent to the Application & Microservice system. After about 5 minutes, if your application appears in the business system list or application list in the console and has data uploaded, the Agent deployment is successful.
Note: If you do not see any application performance data within a few minutes, you can get help as follows:
- Please recheck the above steps to ensure the installation is correct, the directory is correct, and the startup script is correct.
- Check whether the license_key in tingyun.properties matches the License Key you see in the application you created.
- If the above methods are invalid, check the log file
/${path}/tingyun/logs/tingyun_agent.log. You can send the Agent's log file to Tingyun technical support for assistance.
Windows Installation
-
Open tingyun-agent-java-x.x.x.zip.
-
Copy the tingyun directory to the root directory of your application server.
-
Modify the tingyun.properties file in the tingyun directory extracted on the server.
Modify the license_key, app_name, and collector.addresses configuration items in the file. Otherwise, the Agent cannot collect data or start. For other configuration items, configure as needed.
- license_key: Associated with your Tingyun account. Data collected by the Agent will be uploaded to the account bound to this LicenseKey. Hover the mouse over the account name in the lower left corner, select Account Management in the hover menu, and view the License Key in the Account Information tab.
- app_name: Default application name. It is recommended to configure it as the business name of the application.
- collector.addresses: The address and port of the Agent Collector server, e.g., tingyun.server.com:8080. For high-availability deployment, be sure to configure all Agent Collector server addresses and ports in the same data center, separated by commas.
-
In the command prompt (open the console: Windows key + R, then enter cmd):
cd tingyun
java -jar tingyun-agent-java.jar install -
Start or restart your application server.
-
Log in to the Application & Microservice Console to view performance data.
When your Java application service has HTTP requests, performance data will be sent to the Application & Microservice system. After about 5 minutes, if your application appears in the business system list or application list in the console and has data uploaded, the Agent deployment is successful.
Note: If you do not see any application performance data within a few minutes, you can get help as follows:
- Please recheck the above steps to ensure the installation is correct, the directory is correct, and the startup script is correct.
- Check whether the license_key in tingyun.properties matches the License Key you see in the application you created.
- If the above methods are invalid, check the log file
/${path}/tingyun/logs/tingyun_agent.log. You can send the Agent's log file to Tingyun technical support for assistance.